
There’s no question that having a well-installed pond liner is imperative for preventing leaks and ensuring the longevity of your water feature. By following the right steps, you can achieve optimal results that not only protect your pond but also enhance its beauty. This guide will walk you through the necessary preparations, materials, and installation techniques to ensure that your pond liner performs effectively for years to come, avoiding common pitfalls that could lead to future issues.
Table of Contents
Key Takeaways:
- Prepare the pond area by clearing any debris, sharp objects, or vegetation that may damage the liner.
- Choose a high-quality pond liner material tailored for your pond’s size and intended use, ensuring it’s durable and flexible.
- Properly measure and cut the liner, allowing for extra material around the edges to ensure coverage and prevent future leaks.
- Implement a careful installation process by gently placing the liner in the pond, smoothing out wrinkles and air bubbles for an even surface.
- Secure the edges of the liner with stones, soil, or edging materials to keep it in place and protect it from UV rays and physical damage.
Planning and Preparation
The key to a successful pond liner installation lies in thorough planning and preparation. Before you begin, take the time to assess your space and ensure you have everything you need on hand. This will save you time and potential headaches later on in the process.
Site Assessment and Measurements
To start, conduct a comprehensive site assessment to evaluate the area where you plan to install your pond liner. Take accurate measurements of the space, noting any obstacles such as trees, rocks, or utility lines that could affect your pond’s layout.
Essential Tools and Materials
With the right tools and materials at your disposal, your installation will go much smoother. Gather items like a shovel, utility knife, pond liner fabric, and underlayment to protect the liner from sharp objects.
Planning your installation is about more than just gathering tools; it involves ensuring you have everything you need to create a durable pond. Besides the pond liner and underlayment, consider acquiring adhesives for sealing seams, as well as items for water filtration if you’ll be maintaining aquatic life. A well-prepared toolkit allows you to focus on the installation itself, providing you with confidence for a successful pond liner project.
Ground Preparation
Now that you’ve decided to install a pond liner, it’s vital to focus on ground preparation. This process entails ensuring that the area is clear of debris, rocks, and vegetation that could potentially damage your liner. By taking the time to properly prepare the ground, you’ll minimize the risk of punctures and prolong the life of your pond setup.
Excavation Guidelines
Some tips for excavation include starting at the planned pond’s edge and working inward, ensuring a gradual slope to allow for a smooth installation of the liner. Avoid sharp corners, as these tend to stress the liner material. Aim for varying depths to create an appealing and natural look, but ensure that all edges are stable.
Base Layer Construction
You need to focus on constructing a solid base layer for your pond liner. After excavation, add a layer of sand or fine soil to create a soft, smooth surface for your liner, which protects it from potential punctures caused by underlying rocks or irregularities.
Plus, a well-constructed base layer serves as a strong cushion for your liner. Start with a 2 to 3-inch layer of sand or fine soil evenly spread across the entire excavation. This layer acts as a protective barrier, so be vigilant when compacting it to avoid any air gaps. Check for leftover rocks or sharp objects during preparation, as even small items can lead to significant damage over time. Regularly assess the evenness of your base to ensure a flawless installation that will last for years to come.
Safety and Protection Measures
Keep safety your top priority when installing your pond liner. Ensure you wear appropriate protective gear, such as gloves and sturdy shoes, to prevent injuries from sharp tools or edges. Clear the work area of any debris that could pose a hazard, and be cautious when lifting heavy materials to avoid strain. Taking precautionary steps not only keeps you safe but also ensures your project runs smoothly.
Underlayment Installation
Measures should be taken to properly install the underlayment before placing your pond liner. The underlayment serves as a protective layer, preventing punctures from rocks and roots. Make sure to spread the underlayment evenly across the pond’s bottom and edges, overlapping any seams to ensure full coverage. This step is crucial in prolonging the life of your pond liner.
Edge Protection Methods
While laying down the edge protection methods, consider adding stones or bricks around the perimeter of your pond. These materials can help prevent damage from wildlife and weather effects. Your edge protection should be sturdy and stable, holding the liner securely in place while allowing for natural water movement. Proper edge treatment enhances stability and aesthetics, contributing to long-lasting results.
The addition of strong stones or bricks around your pond not only serves a protective function but also provides aesthetic appeal. Make sure that your edge barriers are well-placed and securely anchored to prevent shifting. This extra layer of protection can help shield your pond liner from damage caused by wildlife or the elements, ensuring your pond remains both functional and beautiful throughout the seasons. Prioritize this step to enhance the durability of your pond setup.
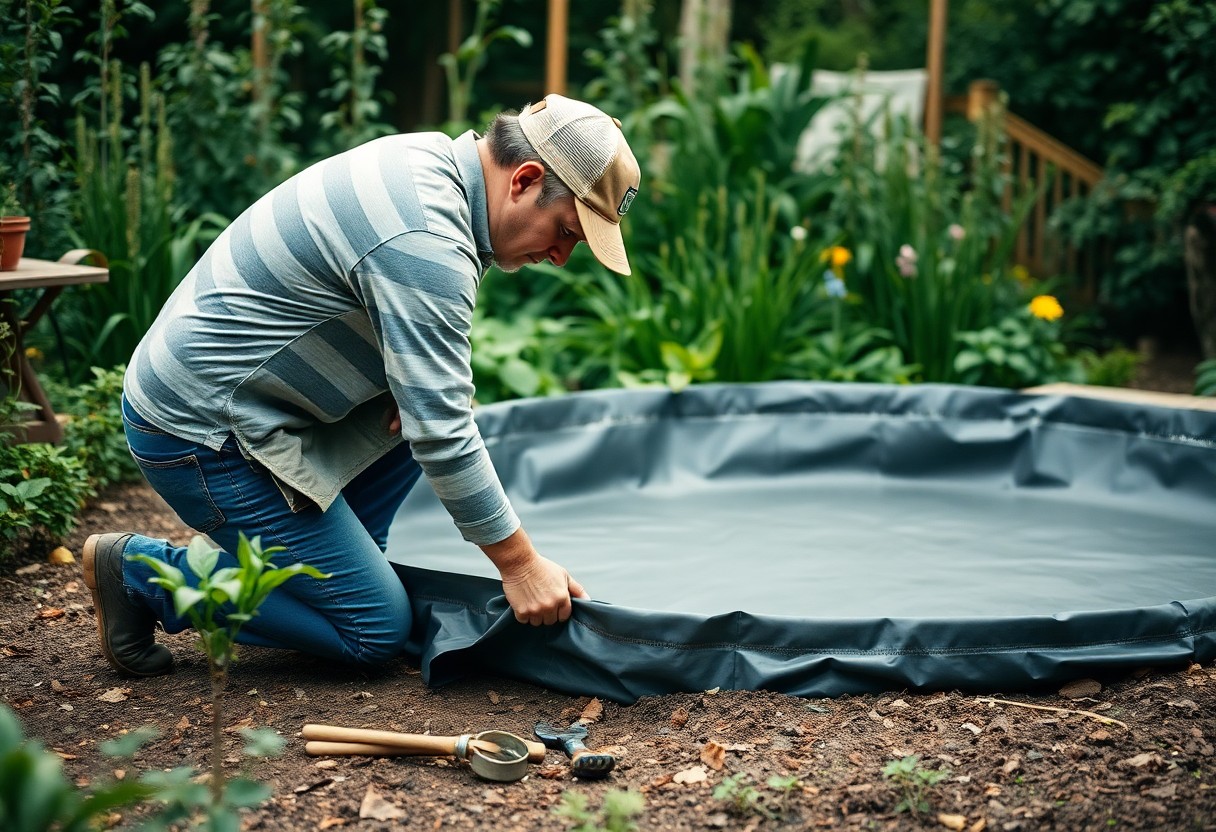
Liner Installation Process
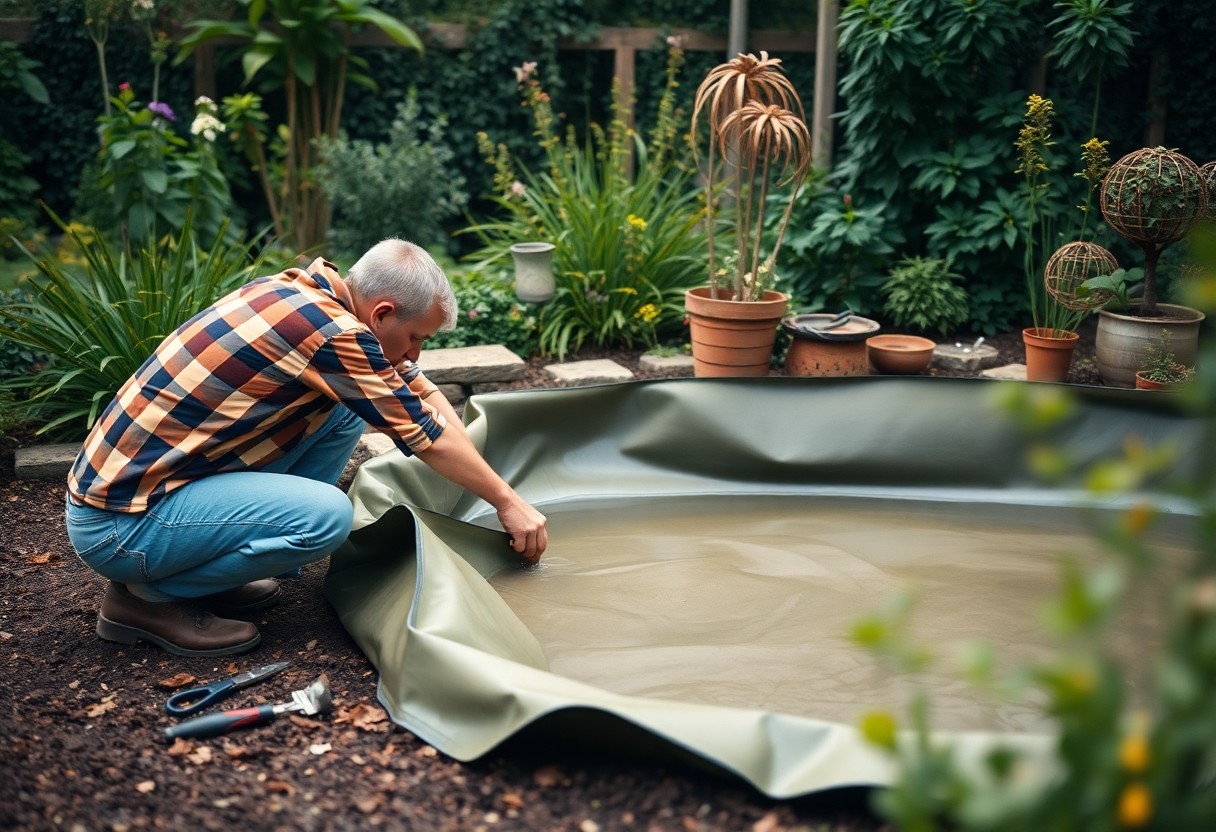
To begin the liner installation process, you need to prepare the pond area meticulously. Clear the site of rocks, sharp objects, and unsightly debris to create a smooth surface. Lay the liner out in the sun for a few hours to make it more flexible, which will help you achieve better placement in your pond’s contours. Once you’re ready, carefully position the liner within the excavation while ensuring it adequately covers the entire area to prevent leaks.
Proper Positioning Techniques
Clearly, the success of your pond liner installation hinges on accurate positioning. As you unfold your liner, pay close attention to the edges, ensuring they extend beyond the pond’s edges by at least 12 inches. This extra material allows for proper anchoring and adjustments as needed. Gradually work the liner into the chosen shape of your pond, smoothing out wrinkles and folds for optimal coverage and aesthetics.
Securing and Anchoring Methods
Clearly, securing and anchoring your pond liner is vital for its longevity. Use landscape fabric or heavy stones to anchor the edges of the liner, especially around high-water areas. You can also apply sandbags or bricks at strategic points to maintain its position during filling. Proper anchoring prevents shifting and guarantees a perfect fit over time.
Methods for securing your pond liner include the use of landscape fabric which serves as a protective barrier beneath the liner, reducing wear and tear. Applying heavy stones along the perimeter will help to keep the liner in place as water is added. Always ensure your anchors are evenly distributed to avoid creating pressure points that could lead to damaging the liner. Regular inspections post-installation will help you catch any potential shifting early on, ensuring your pond maintains its integrity for years to come.
Critical Installation Factors
Not paying attention to the installation factors can compromise the longevity of your pond liner. Consider these aspects:
- Site preparation: Ensure the area is smooth and free of debris.
- Weather conditions: Avoid installation during rain or snow.
- Water levels: Check that the pond is at the desired level.
- Underlay materials: Use protective layers to prevent punctures.
After addressing these factors, you can refer to the Flexible Pond Liner Installation Guide for further tips.
Temperature Considerations
Even when installing your pond liner, temperatures greatly impact its performance. Keep in mind:
| Temperature Range | Impact on Installation |
|---|---|
| Below 50°F | Material becomes rigid and hard to work with. |
| Above 90°F | Risk of stretching and damage increases. |
Fold Management and Seaming
Clearly, proper fold management and seaming are necessary to prevent leaks in your pond liner. Overlapping seams and folds can lead to weak spots if not handled correctly. Ensure that you’re aligning the seams uniformly and applying any necessary sealants to maintain integrity.
A well-executed folding and seaming process will establish a strong barrier against leaks. Keep the folds minimal to prevent sagging, and utilize strong adhesives to seal seams. This will enhance the durability of your pond liner while allowing for natural water flow. Failing to handle these steps with precision may result in costly repairs down the line.
Water Management
All aspects of water management contribute to the longevity of your pond liner. Proper management helps maintain water clarity and quality, preventing costly repairs or replacements. For detailed insights, check out this Comprehensive Guide To RPE Pond Liners: Installations … for effective techniques to keep your pond vibrant and healthy.
Proper Filling Techniques
Even filling your pond correctly is crucial for achieving a balanced ecosystem. Start by filling the pond gradually to allow the liner to settle properly and avoid any stresses that could lead to leaks.
Water Level Monitoring
You must keep a close eye on the water levels in your pond. Regular monitoring will help you identify any potential issues like leaks or excessive evaporation, ensuring you address them promptly.
Level fluctuations can indicate serious issues in your pond. If you notice a rapid drop, it’s vital to investigate for leaks or seepage. Maintaining a consistent water level not only promotes a healthy ecosystem but also prevents damage to your pond liner. Consistent monitoring allows you to enjoy the beauty of your pond while preventing costly repairs caused by neglect.
To wrap up
So, by following the steps outlined for properly installing a pond liner, you can ensure that your installation will yield long-lasting results. Start by planning your pond’s layout and choosing the appropriate liner material. Then, prepare your site meticulously, keeping edges clean and smooth. As you lay the liner, take care to avoid folds and tears, and secure it properly to maintain its shape and integrity. With attention to detail, you will create a beautiful and functional pond that enhances your landscape for years to come.
FAQ
Q: What materials do I need to install a pond liner?
A: To properly install a pond liner, gather the following materials: pond liner (preferably EPDM or PVC), landscaping fabric, pond underlayment, scissors, measuring tape, stakes or rocks for securing, spray adhesive (optional), and a hose for checking water levels. Having the right materials ensures a smooth installation process.
Q: How do I prepare the pond area before laying the liner?
A: To prepare the pond area, start by marking the desired shape of your pond with stakes and string. Remove any grass, rocks, and debris from the area. Next, dig the pond to the required depth, ensuring the sides are smooth and the base is level. Placing underlayment over the excavated area helps protect the liner from sharp objects and roots.
Q: What is the best way to position the pond liner?
A: Positioning the pond liner involves gently unfolding it over the prepared area. Make sure the liner covers the entire pond with extra material extending beyond the edges. If you have a complicated shape, you may need to create folds or pleats to accommodate curves. Ensure that the liner is free of wrinkles and taut without being overly stretched.
Q: How do I secure the pond liner in place?
A: To secure the pond liner, you can use heavy rocks or stakes around the edges to hold it in place temporarily. Once you’re satisfied with the positioning, start filling the pond with water. As the water level rises, it will help the liner settle into place. After the pond is filled, you can bury the excess liner under gravel or soil to create a landscaped edge.
Q: How do I prevent leaks after installation?
A: To help prevent leaks after installation, regularly check the liner for any punctures or damage. Using a pond sealant can also enhance waterproofing. It’s advisable to inspect the liner after heavy weather or when heavy machinery is near the area. Ensuring that any aquatic plants or rocks introduced into the pond are free of sharp edges will also minimize risks of leaks over time.